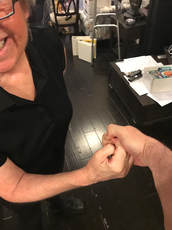
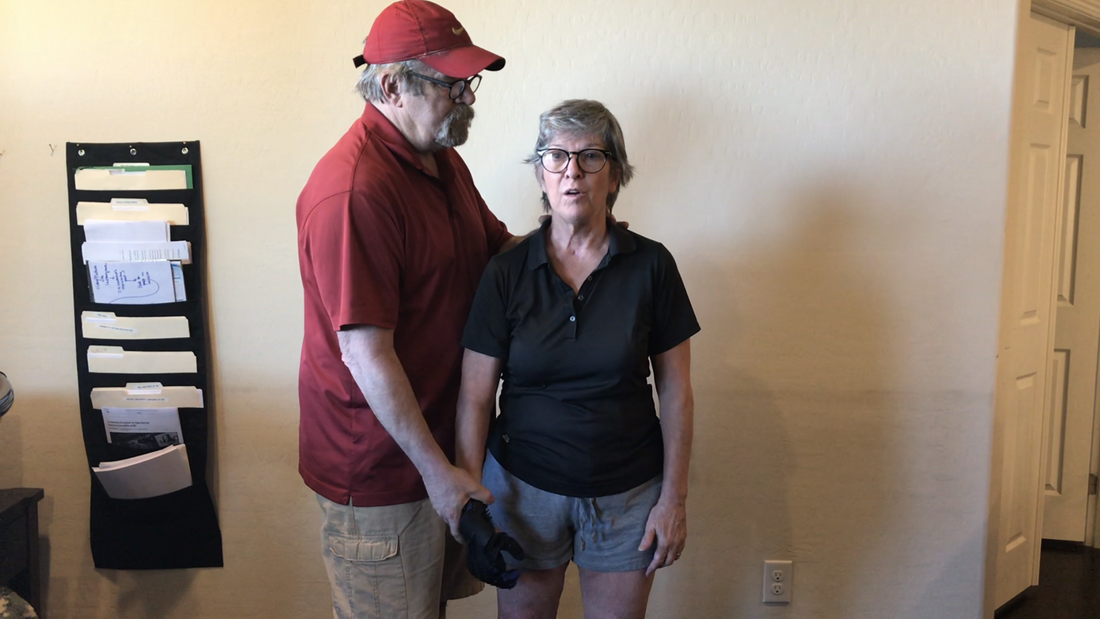
  The exercise I am showing you today addresses my affected side and works my hand and arm. I wear a SAEBO-Glove 8-12 hours per day on my right hand. The reason I wear it for so long is that I generally wear it while I am sleeping at night. The SAEBO-Glove helps me because I am suffering from neurological injuries and the results are stroke-like.
The tension system of the glove extends my fingers and thumb after grasping so that I can incorporate my affected right limb functionally the way it is meant to be. The reason I like this exercise is that it builds strength and mobility throughout my entire arm (and even my hand). It reminds me to bend my elbow (that is what I need for my brain!). This exercise has even helped me with bringing my arm from my side over my body to my opposite shoulder - an exercise that has worked my entire arm again, especially bending my elbow!! And I have noticed that this has helped me with daily activities like with my holding clothes so I can button and zip them. As I mentioned previously, and something I will continue to stress throughout my posts, it is pivotal to perform as many of these exercises in front of a mirror/reflection as possible. This is one of those exercises that I cannot stress the importance of a mirror to be able to watch yourself as you do it. It is our job now to train the neurons from our brain to re-engage with our muscles. Watching your elbow bend and then watching your arm straighten is so important! It has already helped me so much - my ability to “push and pull” my right arm/hand is so much stronger and better (according to Tom) since I’ve been doing these arm/hand open/close & saw exercises! Again, be sure to follow the instructions below. Many post-stroke persons are not limited by actual strength, but by the loss of muscle memory provided by some of the brain’s most elementary functions. Think of these exercises as brain games just as much as strength/mobility activities and you will be on your way to independence in no-time! If you are just starting out - post-stroke - you will probably need someone to support your movement and help when necessary. As I have said before, even if you have reached the point of physical independence after your stroke, it is still nice to have someone supporting you emotionally and mentally through these exercises. INSTRUCTIONS 1. I stand as straight as I can next to Tom with my right arm bent at the elbow. 2. He opens/closes my right hand but I watch it closely and I make sure that I am moving my hand open & close each time rather than just letting Tom force my hand to do so. 3. I repeat the “open/close” 25 times. 4. Then I allow Tom to grab my right hand with his right hand as if he were shaking my hand. 5. Then I push my arm forward. And then I pull my arm back towards me. 6. I repeat the “saw motion” 25 times. 7. On the 25th time, when my arm is pushed forward, I hold it there making sure my wrist remains straight. 8. Then I move it in circles (clockwise for 15 & counter-clockwise for 15). 9. I repeat the circles again. 10. Then I pull my arm arm back towards me. Be sure to check out my Instagram at “poststrokepeg.” God Bless You, Peg “Those who don’t believe in magic will never find it.” —Roald Dahl
0 Comments
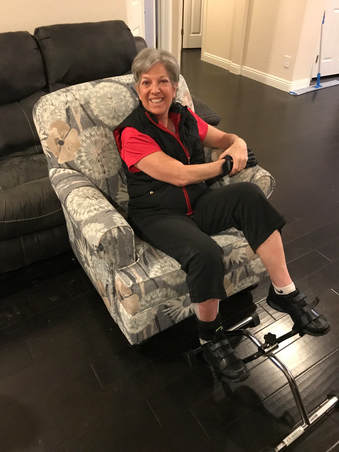
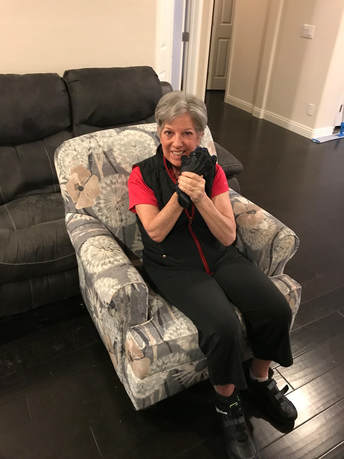 Before I start any exercises of the day, I must warm up my arms & my legs from sleeping a minimum of 8 hours. While I am still in bed I make sure I stretch as much as I can - mostly my arms, my legs, my core & whatever seems stiff. For example, I be sure to move my legs so that I lift them into a knee-bent position. I also bring my arm over my body. As I lie in bed, as best I can, I pull my arm over my body from lying next to my side (my arm, that is) across to its opposite shoulder, & then back to its side again. I do this without touching my body with my arm. Then when I am ready to get out of bed and stand up, I make sure that I allow blood and oxygen to flow through my body from top to bottom. This is when I first begin to start doing some kisses before I start walking out to my “comfy” chair for my actual kisses & leg pedaling. Now I’m ready to walk over from my bedroom to my great-room to really warm up with my actual kisses & leg pedaling. KISSES - INSTRUCTIONS
After you have managed to do this 25 times with no pain, you are ready to lift your affected arm even higher when you are reaching at your face. Start by touching your thumb to your forehead. Once you have that accomplished, try touching the top of your scalp! Eventually this will help you wash your hair with that affected arm/hand again!! As I have said before, and I’ll say it again & again, if you are just starting out - post-stroke - you will probably need someone to support your movement and help you when necessary. Even if you have reached the point of physical independence after your stroke, it is still nice to have someone supporting you emotionally and mentally through these exercises. And, again, use a mirror, it doesn’t hurt to watch your moves & improvement. LEG PEDALING - INSTRUCTIONS
 Be sure to check out my Instagram at “poststrokepeg.” God Bless, Peg
"Failures are finger posts on the road to achievement." ― C.S. Lewis 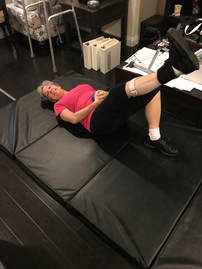 Before I start this exercise, which has proven to be very useful to both my legs, and my core/abdomen, but especially my affected right leg, I use the mat on the floor to do some of my arm exercises. With the arm exercises first I lift my affected right arm over my head (with the assistance of Tom) and bring it back to my side. I do this 25 times, all the while holding my arm straight. This gives extra mobility to my affected right arm. Then I hold my affected right arm straight up in the air for a count of (at least) 100. Then I move my right wrist around and move my right thumb and fingers to ensure movement and dexterity in my right hand, by myself. Now I am ready to move onto my legs! The exercise I am emphasizing for you today addresses my affected leg and works the entire leg and, like I said, works both legs and the core. INSTRUCTIONS
If you are just starting out - post-stroke - you will probably need someone to support your movement and help you when necessary. As I have said before, even if you have reached the point of physical independence after your stroke, it is still nice to have someone supporting you emotionally and mentally through these exercises.  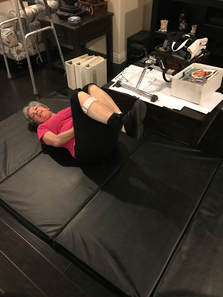 Be sure to check out my Instagram at “poststrokepeg.” God Bless, Peg
"It's not how far you fall, but how high you bounce that counts." ― Zig Ziglar 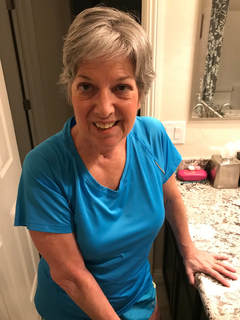 Before I start this exercise today, which has proven to be very useful to my arm, I make sure that my arm is “limber” by doing certain exercises before I start. I certainly do “kisses” which is lifting my right hand up to my mouth-level so that my elbow bends completely and then straightens out completely. This gets it loose and “use” to moving as it needs to for this exercise. I also then do hand “turnovers” at the counter-top which trains my wrist to move as needed. To do the turnovers I flip my hand over, back and forth (although sideways), while it is flat on the counter-top. I also do my floor mat exercises which force me to hold my affected arm up on its own to the count of 100.
I make sure to put a dry tissue down on the counter where I am going to let my hand rest after it stretches out, and before it starts to move straight forward and then with the elbow bend backwards, because it needs the soft and smooth texture of the tissue for my hand to move on the counter-top. It keeps my hand from becoming chafed and scratched while it is moving forward and back. The exercise I am showing you today addresses my affected arm and works the entire arm, from lifting it up, pushing it straight forward and then bringing it down onto the counter. Once it is brought down to the counter, I push it straight forward and then pull it back by bending my elbow. I do this forward and backward motion 5 times each time I raise my arm up which is 10 times with Tom’s assistance and then 10 times on my own. The pushing forward straight and pulling back by bending my elbow mimics my cleaning the counter top with a sponge or washcloth! I be sure to do this entire drill in the bathroom at the counter because I have the full mirror to observe my entire body, not just my arm, work the exercise. The reason I like this exercise is that it builds strength and mobility throughout my entire arm. I remind myself not to use my shoulder for any part of this exercise. I really want to focus my strength on my elbow, primarily, for the bending. I also need to make sure that I don’t allow my right hand (once on the counter and pushing straight) to veer to the left - it must go straight. Again, watching in the mirror helps me immensely with this. And then when I am ready to bring it back, the same thing - I want to ensure that I am going straight back -bending the elbow and not using my shoulder. Again, the mirror helps so much. As I mentioned previously, and something I will continue to stress throughout my posts, it is pivotal to perform as many of these exercises in front of a mirror/reflection as possible. This is one of those exercises that I cannot stress the importance of a mirror to be able to watch yourself as you do it. It is our job now to train the neurons from our brain to re-engage with our muscles. Many post-stroke victims are not limited by actual strength, but by the loss of muscle memory provided by some of the brain’s most elementary functions. Think of these exercises as brain games just as much as strength/mobility activities and you will be on your way to independence in no-time! If you are just starting out - post-stroke - you will probably need someone to support your movement and help when necessary. As I have said before, even if you have reached the point of physical independence after your stroke, it is still nice to have someone supporting you emotionally and mentally through these exercises. Be sure to check out my Instagram at “poststrokepeg.” And also be sure to check out at this website under my other sections to get my blogs on getting to know me, recipes from my family and me, money-maker ideas, therapy ideas, and latest post-stroke research. INSTRUCTIONS
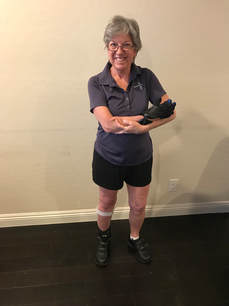
God Bless You, Peg “Health is the greatest strength.” ― Lailah Gifty Akita  Hello again, it's almost time for Therapy Tuesday and I'm ready to show you another favorite exercise of mine. You will see that I am using a three-inch plank on the floor to do Step Ups and Step Downs. This exercise works my thighs, knees, calves and feet. It also works my balance and strength and, believe it or not, works my long-forgotten buttocks muscles! I do the first 5 Step Ups and Step Downs with the support of a cane to give me just that - support (and confidence). Then I switch off the cane and use Tom as a support by holding (loosely) onto the back of the top of my shorts, and I repeat the Step Ups and Step Downs with 20 for a total of 25. I do this exercise once a day and three or four times a week. I want to start doing it every day and do at least a minimum of 35 Step Up and Step Downs each time. Be sure to watch the video of my doing the Step Ups and Step Downs on Instagram at PostStrokePeg. I Step Up and Step Down from the Floor Plank as if I am climbing stairs. In fact, once you feel comfortable with the three-inch height of the floor-plank you can switch this exercise over to a set of stairs (if you have any in your home, or nearby, and that way you'll have the convenience and safety of the handrail). I do these Step Up and Step Downs before I do my Leg Walking Exercises. Remember, I shared those with you - they are first 20 feet forward, 20 feet backward, 20 feet to one side and then 20 feet to the other side. I do those for a repetition of 3-5 times. Be sure to also check this website under Getting To Know Me for my addition from last night COMMUNICATION - PART 1 (the IMPORTANT REASON for Communication) and from today COMMUNICATION - PART 2. (the PRACTICAL REASONS for Communication). Later this week I hope to address another Money-Maker Idea and have a visit from my investment friend Teddy with some tips for me. I also hope to have some latest stroke research and, of course, another fabulous recipe for FOOD FRIDAY!! Enjoy your week and be safe and happy. God Bless, Peg “There is no greater agony than bearing an untold story inside you.” ―Maya Angelou 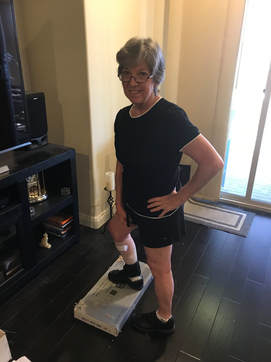 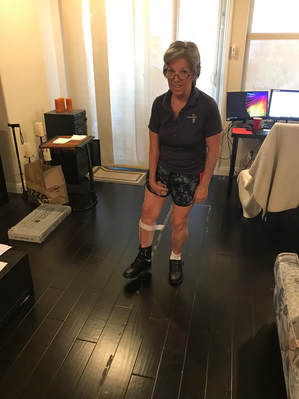 LEG WALKING
The exercise I am showing you today addresses my affected side and works my legs and feet. I wear a custom-fitted AFO (or ankle-foot orthosis, a support intended to control the position and motion of the ankle, compensate for weakness, or correct deformities; AFOs can be used to support weak limbs, or to position a limb with contracted muscles into a more normal position). The reason I like this exercise is that it builds strength and mobility throughout my entire leg and foot, and in fact both my right and left. It reminds me to bend my knees, lift my thighs, to hold my feet flat, turn my body when I need to, etc. This exercise has even gotten me in the habit of going to bed at and lifting my right leg all the way up and over from the floor to the bed as necessary to get it in! Tom is so pleased and impressed! Also, since doing this exercise regularly, I have noticed my ability to perform tasks that I used to be able to do (and no longer could do immediately subsequent to my injury) has improved - tasks that require me to move my right leg more and more - I am able to stand better and longer, walk better and longer and turn better and longer! I don’t even use the cane around the house very often - I walk solo! As I mentioned previously, and something I will continue to stress throughout my posts, it is pivotal to perform as many of these exercises in front of a mirror/reflection as possible. This is one of those exercises that I cannot stress the importance of a mirror to be able to watch yourself as you do it. It is our job now to train the neurons from our brain to re-engage with our muscles. Watching your knee bend and then watching your leg straighten is so important! It has already helped me so much - my ability to “push and pull” my right leg is so much stronger and better (according to Tom) since I’ve been doing these leg walking exercises! Again, be sure to follow the instructions below carefully. Many post-stroke victims are not limited by actual strength, but by the loss of muscle memory provided by some of the brain’s most elementary functions. Think of these exercises as brain games just as much as strength/mobility activities and you will be on your way to independence in no-time! If you are just starting out - post-stroke - you will probably need someone to support your movement and help when necessary. As I have said before, even if you have reached the point of physical independence after your stroke, it is still nice to have someone supporting you emotionally and mentally through these exercises. INSTRUCTIONS 1. At first I do my “Stand Up/Sit Down” exercises using the soft upholstered chair. This gets my thighs used to the up and down movement. Then I do my Floor Plank Step-Up & Step-Down exercises which gets more of my whole leg involved in the movement. 2. My first “walk” is forward, without any cane and about 20 feet. 3. Then I “walk” backwards the same 20 feet. 4. Then I turn to one side and I “walk” 20 feet. 5. Then I turn to the other side and I “walk” the same 20 feet. 6. I do these 4 regimens each 5 times. Be sure to check out my Instagram at “poststrokepeg.” And also be sure to check out at this website under “Getting To Know Me,” my article on Sleeping Regularly 8 Hours Plus. God Bless You, Peg “Those who don’t believe in magic will never find it.” —Roald Dahl 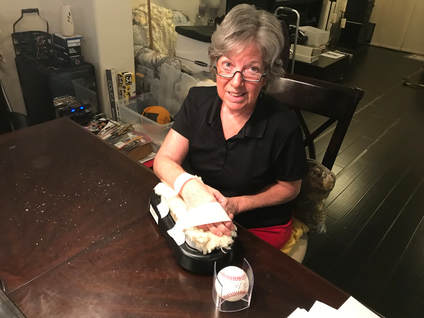 The exercise I am showing you today addresses the affected arm, and (again) much of it. I try to use more of the elbow with this one than I do any other part of the arm though. That reinforces both my arm and my brain to remember what it used to feel like to bend my arm completely.
The reason I like this exercise is that it builds strength and mobility throughout my entire arm, but especially my elbow. It reminds me to bend my elbow whenever I need to and whenever I can. This exercise has even gotten me in the habit of going to bed with my right arm completely bent across the front side of my body - no longer straight down along the right side of my body! Also, since doing this exercise regularly, I have noticed my ability to perform tasks that I used to be able to do (and no longer could do immediately subsequent to my injury) has improved - tasks that require me to move my right arm more and more! As I mentioned previously, and something I will continue to stress throughout my posts, it is pivotal to perform as many of these exercises in front of a mirror/reflection as possible. This is one of those exercises that I cannot stress the importance of a mirror to be able to watch yourself as you do it. It is our job now to train the neurons from our brain to re-engage with our muscles. Watching your elbow bend and then watching your arm straighten is so important! It has already helped me so much - my ability to push and pull my right arm is so much stronger and better (according to Tom) since I’ve been doing this Roller exercise! Again, be sure to follow the instructions below carefully. Many post-stroke victims are not limited by actual strength, but by the loss of muscle memory provided by some of the brain’s most elementary functions. Think of these exercises as brain games just as much as strength/mobility activities and you will be on your way to independence in no-time! If you are just starting out - post-stroke - you will probably need someone to support your movement and help when necessary. As I have said before, even if you have reached the point of physical independence after your stroke, it is still nice to have someone supporting you emotionally and mentally through these exercises. INSTRUCTIONS 1. Today I am sitting comfortably in a chair at my kitchen table. I want to make sure that the chair and the table are both at adequate height so my affected arm will be stretched out so it can bend completely when it comes to me, and straightens all the way out when it pushes away from me (watch the video). 2. My arm has to be free of any brace or glove or paddle to use the roller. I place my arm (from my fingertips up to where my elbow bends) on the roller. Consider using the Therafin Ergo Arm Skate With Hand Piece (manufactured by the Therafin Corp. (item 30100). I secure my lower arm to the roller using Velcro (and medical gauge straps). Again, I make sure that I can move my “lower” arm (tethered in the roller) towards me (elbow completely bent) and away from me (arm completely straight). 3. When my “lower” arm comes towards me I hold and count to 25 (not each time, but every 4-5 times), and when my “lower” arm straightens out I count to 25 (also not each time, but every 4-5 times). Be sure to check out my Instagram at “poststrokepeg.” And also be sure to check out at this website under “Getting To Know Me,” my article on Consistency. God Bless You, Peg "It always seems impossible until it's done." -- Nelson Mandela 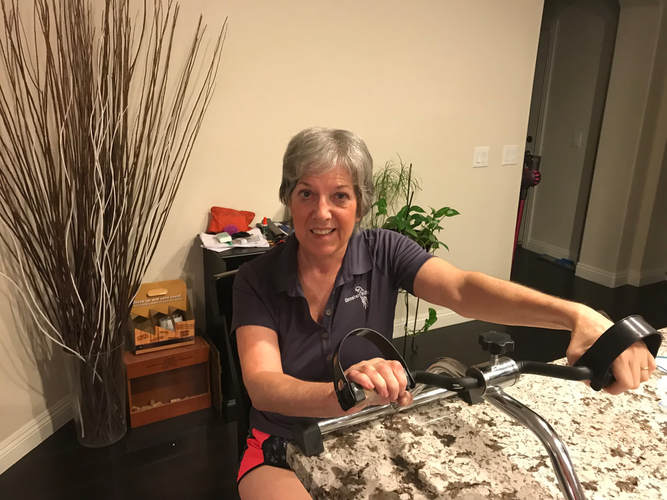 Today I get to use the same piece of equipment that I use to warm up my legs - the PEDDLER! This time I situate the peddler on a counter in front of me with a tall chair to sit on - be sure the peddler is safely secured (watch my video). At first, you may need to secure your hand/wrist so it/they do not slide off. The exercise I am using this for today addresses the affected arm, and all of it - the shoulder, the tricep, the bicep, the elbow, the wrist and the hand. If you are just starting out - and are post-stroke - you will probably need someone to support your movement and help you when necessary. Luckily, I have Tom to help me through my therapy sessions. Even if you have reached the point of physical independence after your stroke, it is still nice to have someone supporting you emotionally and mentally through these exercises. The reason I like this exercise is that it builds strength and mobility throughout the entire arm. Since doing this exercise regularly, I have noticed my ability to perform tasks that I used to be able to do (and no longer could do immediately subsequent to my injury) has improved. As mentioned previously, and something I will continue to stress throughout my posts, it is pivotal to perform as many of these exercises in front of a mirror/reflection as possible. I will describe in another post the reasoning behind this in more detail. It is our job now to train the neurons from our brain to re-engage with our muscles. I do this circular around the peddler for 20 minutes. I make sure that I push and pull with my right arm as much as possible. I also make sure that I am gripping onto the handle with my hands which allows me to force my hand to grab the bar. Many post-stroke victims are not limited by actual strength, but by the loss of muscle memory provided by some of the brain’s most elementary functions. Think of these exercises as brain games just as much as strength/mobility activities and you will be on your way to independence in no-time! Be sure to check out my Instagram at “poststrokepeg.” And also be sure to check out at this website, under “Getting To Know Me,” my article on Motivation. God Bless You, Peg Your talent is God's gift to you. What you do with it is your gift back to God. --- Leo Buscaglia
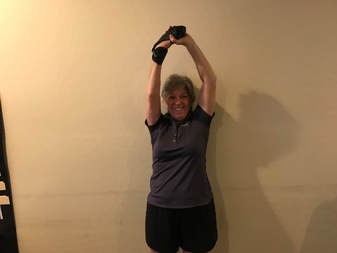
Today’s exercise addresses the affected arm after a stroke, and in my case the right arm. I have already shared with you, and shown you, my other two daily arm therapy exercises which were the “Up ‘N Overs” and the “Touchdowns.” Both of those I generally do twenty-five reps each and two-three sets (times) per day (after breakfast, after lunch and before dinner, provided I have the time to do three sets in the day). The reason I like this exercise is because I am able to work out my entire arm which is getting it back in shape for doing what it did before my stroke (like cooking, cleaning, laundry - ha!). This exercise, the “Butterfly,” along with the “Up ‘N Overs” and the “Touchdowns,” make me work my upper arms, my elbow and my wrist. As mentioned in my video on Instagram (poststrokepeg), and something I will continue to stress throughout my posts, it is pivotal to perform as many of these exercises in front of a mirror/reflection as possible. I will describe in another post the reasoning behind this in more detail. It is our job now to train the neurons from our brain to re-engage with our muscles. Start by standing in front of a mirror/reflection with the mind focused on your arm’s relationship to the rest of your body during this exercise. Think about how all the muscles in your body are working together to enable this movement. How is this possible? Be sure to ask yourself, “What exactly am I moving to produce this motion? How can I replicate this myself? What daily chores/routines call to use this type of movement?”
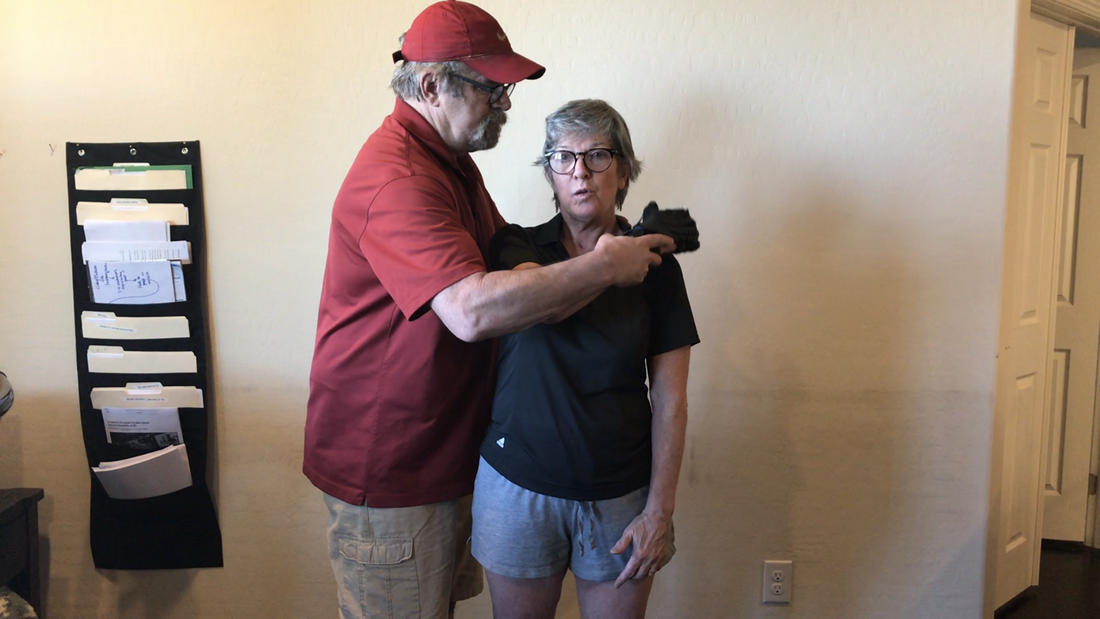
Many post-stroke victims are not limited by actual strength, but by the loss of muscle memory provided by some of the brain’s most elementary functions. Think of these exercises as brain games just as much as strength/mobility activities and you will be on your way to independence in no-time! Today’s Therapy/Exercise focuses on the affected arm by utilizing a wide range of motion. Similar to “Up ‘N Downs,” this exercise gives you the opportunity to really move your entire affected arm - specifically targeting the range of motion you wish to achieve fully with your shoulder. (Note - I work this exercise with Tom - though I am working everyday to ensure that I am giving more of myself and using less of him.) Start by standing straight and facing a mirror/reflection so you can watch your reflection during every move. Remember...it is very important to watch your body parts (more than just the affected arm in this case) move during recovery therapy/exercises because it retrains your brain. With your hand at your side, first, bring your entire arm in front of your body and keep your arm extended as you raise it above your head. At the highest point your hand can be extended, you should briefly keep the position for just a second. This is to regather your thoughts and focus on the movement downwards. Make sure you bring your arm back down in a controlled manner. Then rest and complete your next set before moving to my next exercise. As I mentioned, I repeat this therapy/exercise 3 times per day - after I eat breakfast, after I eat lunch and before I eat dinner. I make sure that I focus on my arm during this therapy/exercise and I don’t let my mind wonder. As mentioned above, it is important during these exercises to focus on quality. It is far better for you to be able to keep control of your arm during this entire movement than to crank reps out. A controlled movement downwards is key to having a successful therapy session. Now, I’ve got to get back to finish my therapy for now! And as promised Teddy is back!! But be sure to Tune in next week for a new installment of exercises. Today’s Therapy/Exercise focuses on the affected arm by utilizing a wide range of motion. Similar to “up n’ downs,” this exercise gives me the opportunity to really move my entire affected right arm - specifically targeting the range of motion I wish to achieve fully with my shoulder. I work this exercise with Tom - though I am working everyday to ensure that I am giving more of myself and using less of him.
SETS x REPS 2 x 25 I start by standing straight and facing a mirror so I can watch my reflection during every move. Remember...it is very important to watch your body parts move during recovery therapy/exercises because it retrains your brain. With my hand at my side, first, I bring my entire arm in front of my body and keeping my arm extended as I raise it above my head. At the highest point my hand can be extended, I briefly keep the position for just a second. This is to regather my thoughts and focus on the movement downwards. Make sure you bring your arm back down in a controlled manner. I rest then complete my second set before moving to next exercise. I repeat this therapy/exercise 3 times per day - after I eat breakfast, after I eat lunch and before I eat dinner. I make sure that I focus on the arm during this therapy/exercise and I don’t let my mind wonder. As mentioned above, it is important during these exercises to focus on quality. It is far better for you to be able to keep control of your arm during this entire movement than to crank reps out. A controlled movement downwards is key to having a successful therapy session. Now, I’ve got to get back to my second rep! Tune in next week for a new installment of exercises. And here's Trader Teddy to visit with me again as promised & give me 2 stocks under $10 that I can invest in.  Today’s exercise addresses the affected arm, and all of if - the shoulder, the bicep, the elbow, the wrist and the hand. If you’re just starting out - post-stroke, like me! - you will probably need someone to support your movement and help when necessary. Luckily, I’ve got Tom to help me through my therapy sessions. Even if you’ve reached the point of physical independence after your stroke, it’s still nice to have someone supporting you emotionally and mentally through these exercises. The reason I like this exercise is that it builds strength and mobility throughout the entire arm. Since doing this exercise regularly, I’ve noticed my ability to perform tasks that I used to be able to do (and no longer could do immediately subsequent to my injury) has improved. As mentioned in my video, and something I will continue to stress throughout my posts, it is pivotal to perform as many of these exercises in front of a mirror/reflection as possible. I will describe in another post the reasoning behind this in more detail. It is our job now to train the neurons from our brain to re-engage with our muscles.
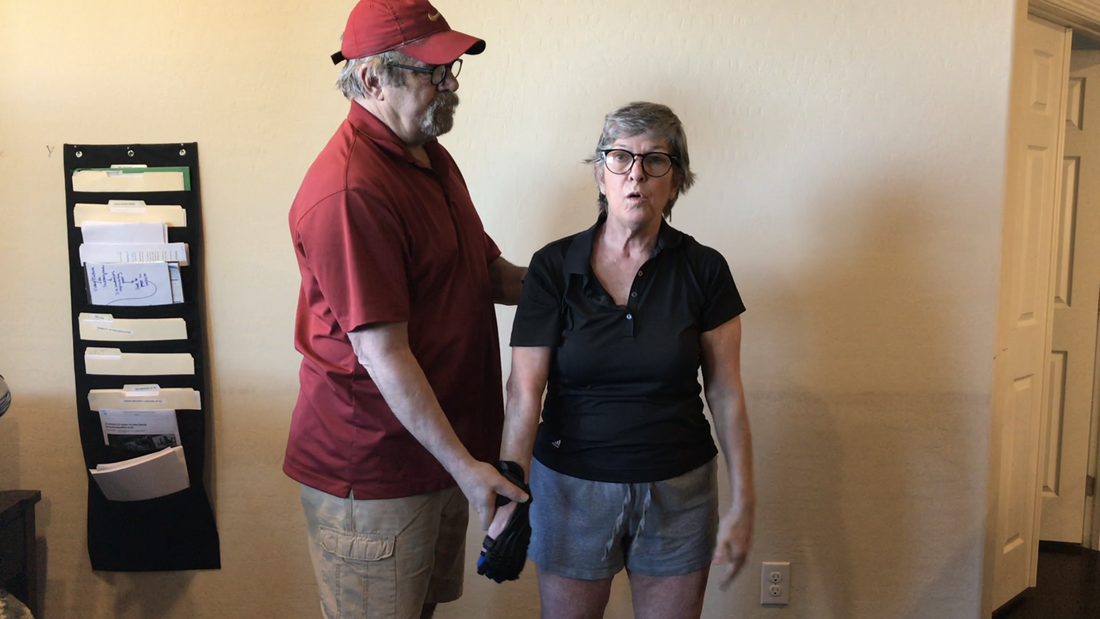
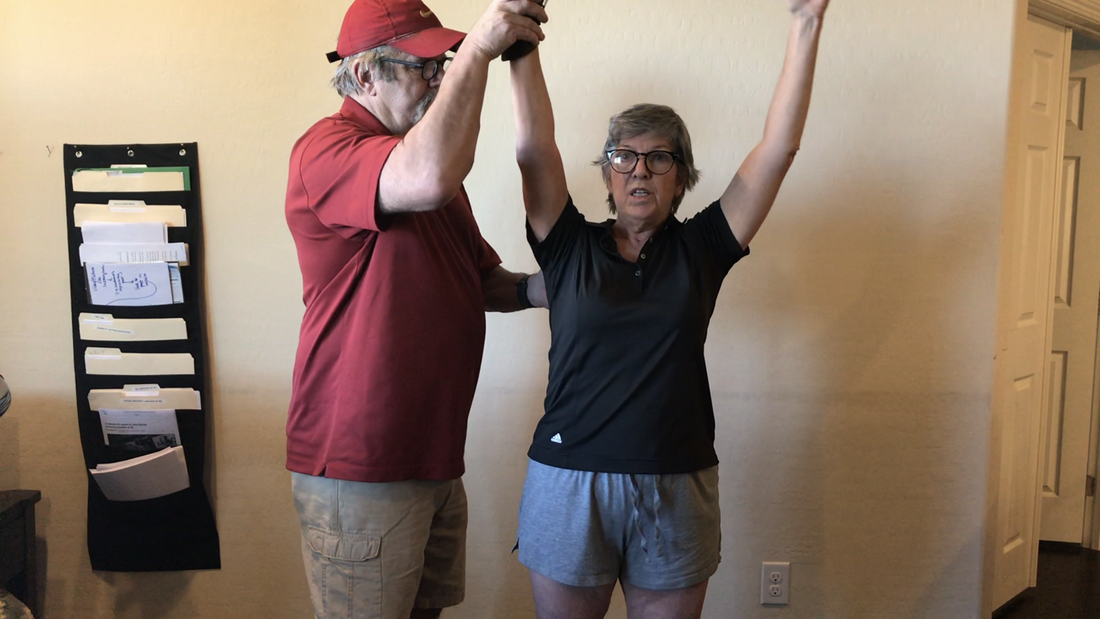
SETS x REPS 2 x 25 Start by standing in front of a mirror with both arms relaxed at the side of your body. Your partner will hold just above the wrist in order to help facilitate the movement. Next, with the help of your partner, bring the arm “up n’ over” your body. At the peak of this movement, your hand should be placed alongside your opposing shoulder. Once you’ve reached the opposite shoulder, you can bring the hand back down to your side. As mentioned above, repeat 25 times before resting. Rest. Complete second set before moving to next exercise. I recommend doing this exercise at least 3 times throughout the day. The ideal times to get in your reps, in my opinion, are as follows: 1) right after breakfast, 2) right after lunch, and 3) right before dinner. Up n’ overs are to be completed with the other arm exercises I have provided/will provide on the blog.
Remember, it is crucial to keep the mind focused on your arms’ relationship to the rest of your body during this exercise. Think about how all the muscles in your body are working together to enable this movement. How is this possible? What exactly am I moving to produce this motion? How can I replicate this myself? What daily chores/routines call to use this type of movement? Many post-stroke victims are not limited by actual strength, but by the loss of muscle memory provided by some of the brain’s most elementary functions. Think of these exercises as brain games just as much as strength/mobility activities and you will be on your way to independence in no-time! MY AILMENT
I was diagnosed with a SUB-DURAL HEMATOMA on October 10, 2017. I had no known accident, injury, or fall leading up to the hematoma. My surgeries included multiple craniotomies to drain the blood from my skull surrounding my brain, a decompressive craniotomy which was the temporary and partial removal of my skull, the installation of a ventilator and then the installation of a tracheotomy to breathe, the installation of a PEG tube to feed, and induced coma. After the first night and the first 2 surgeries, I was given 24-48 hours to live. Tom told Annie the doctors did not know my ability to survive. Well, almost 1 year later, here I am. And Tom was right...the doctors did not know me. And you, do not know me. But I want you to know me, what I have to offer you and your loved ones and, most of all, what I want to offer my loved ones, especially Tom and Annie. Let me start by saying that I was a very successful person of 59 years. I was not even supposed to survive my own birth. The doctors told my father as they prepared my mother for an emergency C-section that they could save my mother but they could not save the unborn child. Well, I proved those doctors wrong too! I want to share as much as I can with you and that includes my thoughts and ideas on therapies and moves. I decided to start with one of my leg exercises because it is important to me to be able to walk unattended and rely little on a walker or cane (eventually). |
therapyHere you'll find drills, places of support, emotional guidance, and everything in between! Archives
January 2019
Categories |
 RSS Feed